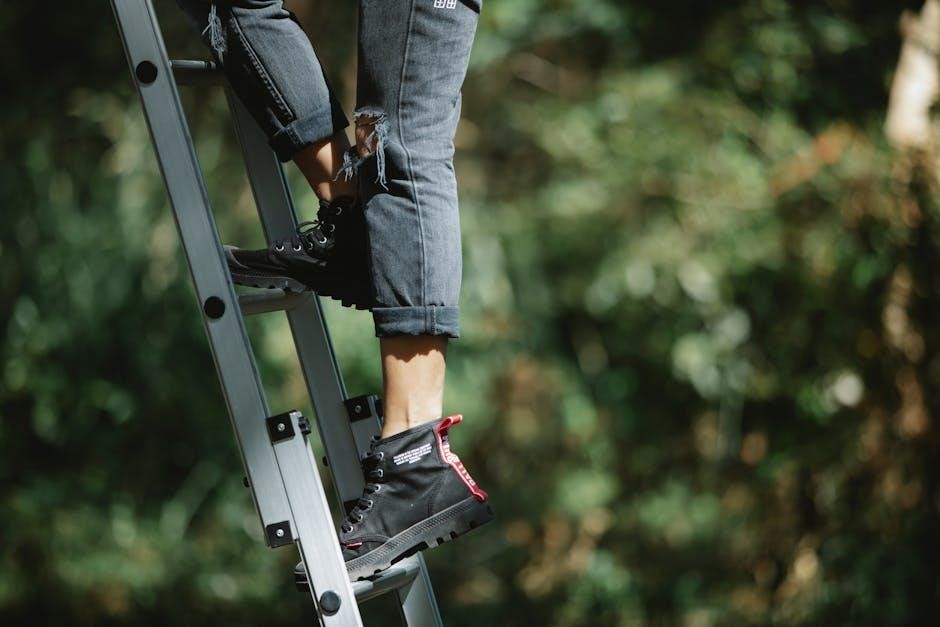
step by step guide to gel nails
Achieve salon-quality, glossy gel nails from the comfort of your home. This guide simplifies the process, making DIY gel manicures accessible and fun. Enjoy chip-free, long-lasting results that stay flawless for weeks, saving you time and money compared to salon visits.
The Benefits of DIY Gel Nails
DIY gel manicures offer numerous advantages, notably delivering stunning, salon-quality results without the hefty price or time commitment of professional appointments. Imagine crafting glossy, chip-free nails effortlessly from your home, saving significant money and hours. This personalized approach makes sophisticated nail care accessible and convenient, transforming your beauty routine.
Gel polish, cured under a UV or LED lamp, bonds tightly, ensuring exceptional durability. This process locks in vibrant color and brilliant shine, making your manicure resistant to chips and smudges for up to three weeks. Unlike conventional polish that quickly fades or peels, DIY gel remains flawless through daily activities, maintaining its high-gloss appearance consistently.
This system provides a robust, nearly indestructible finish, offering superior longevity and strength. It’s the easiest way to keep nails looking consistently fresh and professional without frequent touch-ups. Mastering the application, guided by simple steps, ensures rewarding, long-lasting beauty right at your fingertips, boosting confidence in your self-care.

Gathering Your Essential Gel Nail Supplies
Before starting your gel manicure, gather essential supplies for a smooth process. You’ll need a UV/LED lamp, gel base and top coats, your chosen gel color polish, a nail file, buffer, cuticle pusher, and lint-free wipes with isopropyl alcohol for a perfect finish.
List of Must-Have Tools
To achieve a flawless at-home gel manicure, having the right arsenal of tools is paramount. First and foremost, a reliable UV or LED lamp is indispensable for curing each layer of gel polish, ensuring its durability and shine. Without proper curing, the gel will not set, leading to smudges and peeling. Next, you will need the core gel products: a high-quality gel base coat to create a strong foundation and promote adhesion, your chosen gel color polish for vibrant and long-lasting color, and a durable gel top coat to seal everything in with a high-gloss, chip-resistant finish.
For nail preparation, essential items include a fine-grit nail file for shaping and smoothing the nail edges, a gentle nail buffer to lightly abrade the nail plate for better polish adherence, and a cuticle pusher or orange stick for careful cuticle management. Cleansing is crucial, so stock up on lint-free wipes and a suitable nail cleanser or isopropyl alcohol to dehydrate the nail plate and remove any oils or residue. Finally, for post-application care and a professional touch, keep cuticle oil handy. An optional yet helpful tool is a small angled brush dipped in acetone for precise cleanup around the cuticles during application, ensuring neat lines and preventing lifting.

Crucial Nail Preparation Steps
Proper nail preparation is the most crucial step for a successful, lasting gel manicure. It ensures strong adhesion, preventing lifting and chipping. This foundation work transforms your nails into a clean, smooth canvas, ready for flawless gel application that will endure for weeks without issues.
Removing Old Polish and Shaping Nails
Removing old polish and meticulously shaping your nails forms the foundational stage for a flawless gel manicure. Begin by thoroughly removing any existing nail polish, oils, and residues. Use a lint-free wipe generously soaked in pure acetone to effectively strip away all traces of old lacquer and natural oils. This crucial step ensures a pristine surface, free from contaminants that could hinder the adhesion of new gel layers. Once the nails are completely clean and dry, proceed to shaping.
Using a quality nail file, carefully shape each nail to your desired length and form. Whether you prefer a classic oval, a trendy coffin, or a practical square, consistency is key. File gently in one direction to prevent splitting and weakening of the nail plate. This precise shaping not only enhances the aesthetic appeal of your manicure but also creates a uniform canvas, optimizing the subsequent application of gel products. A well-prepared nail bed, free of old polish and perfectly shaped, is indispensable for achieving a long-lasting, professional-looking finish. This initial attention to detail significantly contributes to the overall durability and beauty of your at-home gel nails.
Cuticle Care for a Clean Canvas
Proper cuticle care is a crucial step for achieving a long-lasting, professional gel manicure at home. It ensures the gel polish adheres flawlessly to the nail plate, preventing premature lifting and contributing to a tidy, durable finish. Start by applying a gentle cuticle softener or remover around the base of each nail, allowing it to work as directed to loosen any dry or excess skin effectively.
Next, using a dedicated cuticle pusher or an orange stick, meticulously and gently push back the softened cuticles. Employ light, controlled pressure to avoid damaging the delicate skin or the nail matrix. The primary objective is to reveal more of the natural nail surface by carefully pushing back the non-living tissue, never cutting it. This precise action creates a clean, clear margin around the nail, actively preventing the gel from touching the surrounding skin. This careful preparation is paramount for a neat application, minimizing flooding, and significantly enhancing your manicure’s longevity and flawless appearance.
Buffing and Dehydrating the Nail Plate
After meticulous cuticle care, preparing the nail plate for optimal gel adhesion is crucial. Begin by lightly buffing the entire surface of each nail. The goal is to gently remove natural shine, creating a subtle texture for the gel base coat to grip effectively and prevent premature lifting. Use a fine-grit buffer with minimal pressure; the aim is surface texture, not thinning or damaging the natural nail. Over-buffing weakens nails, so use a light hand, ensuring the entire nail surface is lightly scuffed for proper bonding.
Following buffing, thorough dehydration of the nail plate is essential. Wipe each nail meticulously with a lint-free pad soaked in isopropyl alcohol or a specialized nail cleanser. This critical action effectively strips away lingering natural oils, buffing dust, and other residues that impede adhesion. A perfectly clean, dehydrated nail plate is paramount; oils and moisture significantly contribute to gel polish peeling. This vital preparation ensures the base coat bonds securely, establishing a robust foundation for a durable, chip-free gel manicure that lasts weeks, mimicking a professional salon finish.
Step-by-Step Gel Polish Application
Achieving flawless gel nails involves precise, thin, even layers. Each coat—base, color, and top—requires proper curing under a UV/LED lamp. This meticulous, step-by-step application ensures a salon-quality, chip-free manicure that remains stunning and durable for weeks.
Applying the Thin Base Coat
The foundation of a lasting gel manicure is the precise application of a thin base coat. This initial layer is crucial for strong adhesion, preventing premature lifting or chipping. Begin by brushing a very thin, even coat onto each nail, carefully capping the free edge for durability. Avoid flooding cuticles or sidewalls; maintain a tiny, clean margin. This ensures the gel bonds exclusively to the nail plate, not skin, which is vital for preventing lifting and impacting longevity.
Once applied, promptly place your hand under your UV or LED lamp. Cure the base coat for the product’s specified duration, typically 30-60 seconds. This process activates the gel, creating a tacky, adhesive surface that firmly grips the nail, providing the perfect bond for subsequent color layers. Never rush or skip this vital step. A properly cured base coat determines your manicure’s overall strength, longevity, and chip-free performance, truly acting as the invisible hero that holds everything together for weeks.
Building Color with Thin Gel Layers
The process of building vibrant color with gel polish relies on applying multiple thin layers, rather than one thick coat. Begin by applying your first thin, even coat of gel polish to each nail, remembering to cap the free edge. It is completely normal for this initial layer to appear somewhat streaky or translucent; resist the urge to apply more product. Immediately after application, cure this layer under your UV or LED lamp for the recommended time, typically 30-60 seconds. This partial curing sets the gel, preparing it for the next step.
Next, apply a second thin coat of your chosen gel color, again ensuring an even spread and capping the tips. This layer will significantly enhance opacity and vibrancy. If you notice any polish touching your cuticles or skin, gently clean it off with an angled brush dipped in acetone before curing to prevent lifting. Cure the second coat thoroughly under the lamp. For some colors or desired intensity, a third thin coat might be necessary to achieve full, rich opacity. Always cure each layer separately to ensure proper hardening and a flawless, chip-resistant finish. This meticulous layering ensures a smooth, professional, and long-lasting manicure.
Sealing with the Gel Top Coat
The final crucial step in achieving a durable and high-gloss gel manicure is the application of the top coat. This layer acts as a protective shield, locking in your color and providing that coveted salon-quality shine. Begin by applying a thin, even layer of gel top coat over your cured color layers, ensuring you cover the entire nail surface. Just as with the previous steps, it is essential to “cap” the free edge of each nail. This technique involves brushing a thin line of top coat along the very tip of the nail, which helps to seal the layers and prevent chipping or lifting, significantly extending the wear of your manicure.
Once applied, place your nails back into the UV or LED lamp for the final curing process. The curing time for the top coat can vary, but generally ranges from 30 to 90 seconds, depending on your lamp’s wattage and the specific product instructions. After curing, you will notice a sticky, tacky residue on the nail surface; this is known as the inhibition layer. To reveal the brilliant, mirror-like finish, gently wipe each nail with a lint-free wipe saturated with isopropyl alcohol or a dedicated gel nail cleanser. This simple action transforms the tacky surface into a smooth, hard, and incredibly glossy result, ready to withstand daily wear for weeks.
Wiping the Sticky Inhibition Layer
After the final curing of your gel top coat, you will observe a sticky, tacky film on the surface of each nail. This is commonly referred to as the “inhibition layer” or “dispersion layer,” a normal byproduct of the gel polymerization process under UV or LED light. It is crucial to remove this layer to reveal the true shine and hardness of your gel manicure and to prevent dust or debris from sticking to the surface.
To do this effectively, gather a clean, lint-free wipe and saturate it generously with either isopropyl alcohol (rubbing alcohol) or a specialized gel cleanser designed for this purpose. Avoid using cotton balls or regular tissues, as they can leave behind undesirable fibers that will embed in the sticky layer, marring your flawless finish. Gently but firmly wipe each nail, from cuticle to free edge, ensuring all of the tacky residue is thoroughly removed. You will immediately notice the transformation as the dull, sticky surface becomes brilliantly glossy and smooth. This small but vital step is what truly gives your at-home gel manicure its professional, mirror-like finish, making it ready for post-application care and daily wear.

Post-Application Care for Durability
To maximize your gel manicure’s durability, consistent post-application care is crucial; Hydrating cuticles and avoiding early water exposure are key. These practices prevent lifting, ensuring your salon-quality nails remain flawless for weeks.
Hydrating with Cuticle Oil

Once your gel polish is thoroughly cured and the sticky inhibition layer has been wiped away, applying cuticle oil is essential. This crucial step profoundly impacts both your nail health and the pristine, lasting appearance of your new gel manicure. Cuticle oil is specifically formulated to nourish and soften the delicate skin surrounding your nail plate, actively preventing common issues such as dryness, painful cracking, and unsightly hangnails. A well-conditioned cuticle forms a vital protective barrier, safeguarding the nail matrix and encouraging stronger, healthier nail growth beneath your beautiful, vibrant gel layers. Gently massaging a high-quality cuticle oil into your cuticles and adjacent skin, immediately after your manicure and consistently throughout the week, adds that coveted professional touch. This consistent nourishment keeps your skin perfectly supple and flexible. Crucially, it helps prevent the gel from lifting prematurely, as dry cuticles can sometimes exert tension at the polish edge, compromising its seal. Incorporating this hydrating ritual ensures your gel manicure maintains its flawless, high-gloss finish. This dedicated care allows your stunning manicure to consistently last up to three weeks without any diminishing of its initial salon-quality appearance or shine.
Avoiding Early Water Exposure
Avoiding early water exposure is a critical, yet often overlooked, step in extending the life and maintaining the flawless integrity of your freshly applied gel manicure. While gel nails are renowned for their impressive durability and chip-free finish, they are most vulnerable in the immediate hours following application, particularly to significant contact with water, and especially hot water. Exposing your nails too soon can compromise the crucial bond between the gel layers and your natural nail plate. Water, particularly when warm, can cause the nail plate to expand slightly. If this happens before the gel has completely settled and formed its ultimate, strong adhesion, it can lead to subtle lifting around the edges or even bubbling beneath the polish. This early compromise significantly reduces the longevity of your manicure, potentially causing peeling or chipping well before its expected two to three-week wear time. To ensure maximum adhesion and resilience, it is highly recommended to avoid prolonged immersion in water, hot showers, dishwashing without gloves, or any activities involving excessive moisture for at least the first few hours after completing your gel application. This short period of carefulness allows the gel to fully ‘settle’ and achieve its maximum strength, ensuring your nails remain perfectly sealed, glossy, and chip-resistant for an extended duration. This small precaution makes a big difference in the overall success and lifespan of your at-home gel manicure.
Troubleshooting and Expert Tips
Mastering at-home gel manicures involves understanding common pitfalls and expert strategies. If your gel polish peels, the leading cause is inadequate nail preparation. Oils, moisture, or insufficient buffing drastically reduce adhesion. Always ensure cuticles are meticulously pushed back, the nail surface lightly buffed for texture, and all residues removed with alcohol or cleanser before base coat application. Applying thin, even layers is crucial; thick coats risk incomplete curing, bubbling, or wrinkling. If the first color coat appears streaky, a second thin layer will achieve full opacity. Should polish pull back from cuticles, it indicates over-application, so use a lighter hand. Proper curing under a quality UV/LED lamp for recommended duration is vital for longevity, as under-cured gel will not last. For ultimate durability, “cap” the free edge of each nail with every coat – base, color, and top – to create a complete seal. Finally, for a professional, mirror-like finish, always wipe the sticky inhibition layer after the top coat cures using a lint-free pad soaked in isopropyl alcohol. Investing in good quality products also significantly helps. Avoid using nails as tools to maintain your flawless manicure.


Leave a Reply
You must be logged in to post a comment.